
Sky Cape Crochet Pattern
March 8 2025
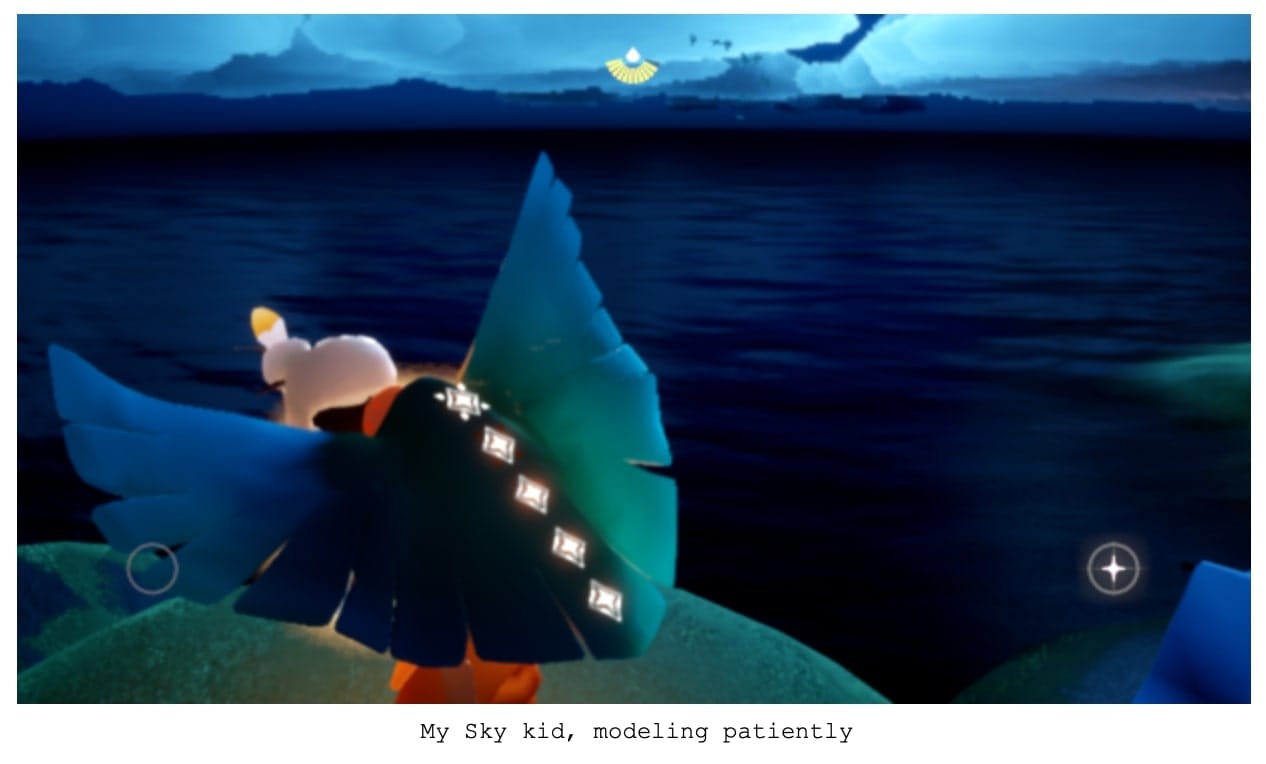
Hey everyone my name is Chelsea! During the day I work with the Player Safety crew at thatgamecompany, and in my free time, I enjoy playing Sky and crocheting (although rarely at the same time).
This pattern was cobbled together from several different pre-existing patterns scoured from the internet, but none of which I own, so please find the pattern owners linked below. I hold much gratitude to the people who originally created the forms I’ve compiled here. I do not have any affiliation or make any profits from any of these instructions or recommendations.
It’s by the grace of the Elder Spirits that this cape came out even vaguely similar to what I set out to achieve, and I hope these instructions will allow my fellow Sky kids to craft their capes!
(Disclaimer: Sky capes do not convey the ability to fly. If you feel you must try flying, make sure you attempt to take off from the level ground. Otherwise, good luck, and keep in mind the immortal words of Douglas Adams: “Just throw yourself at the ground and miss”.)
Let's get started
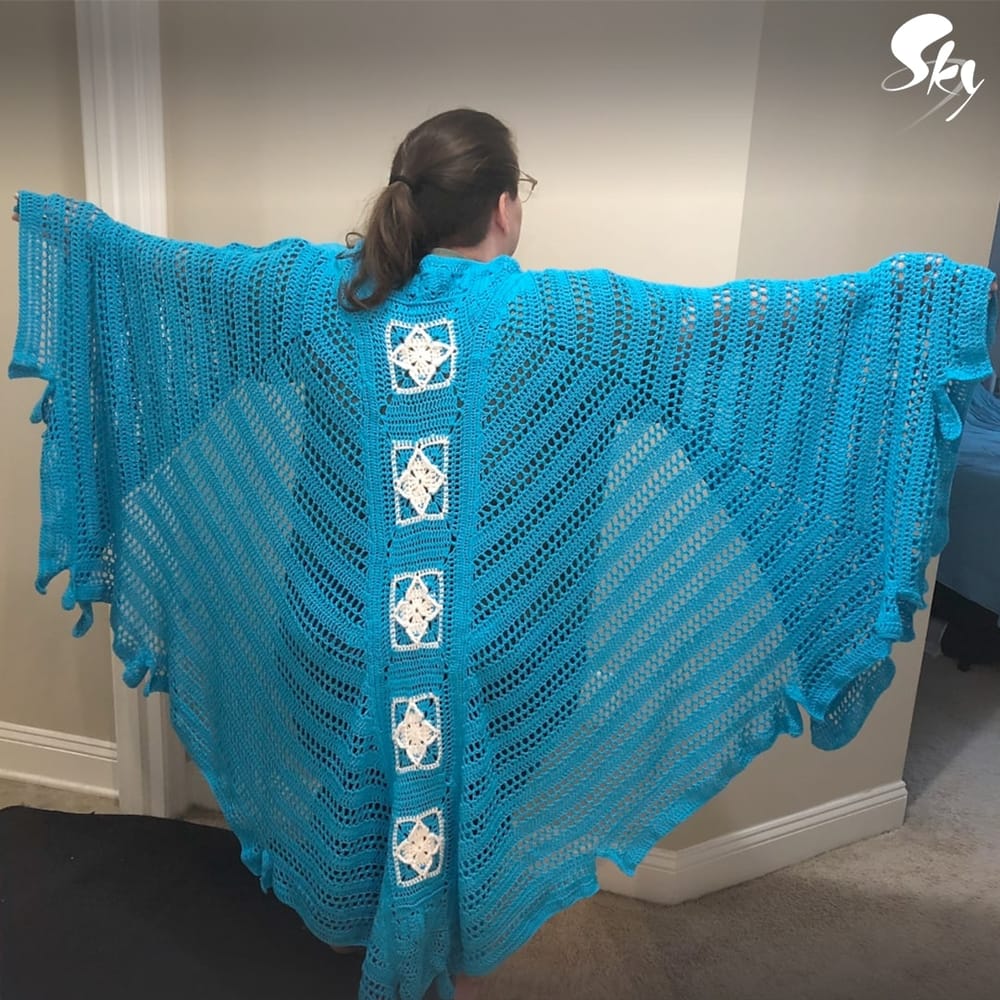
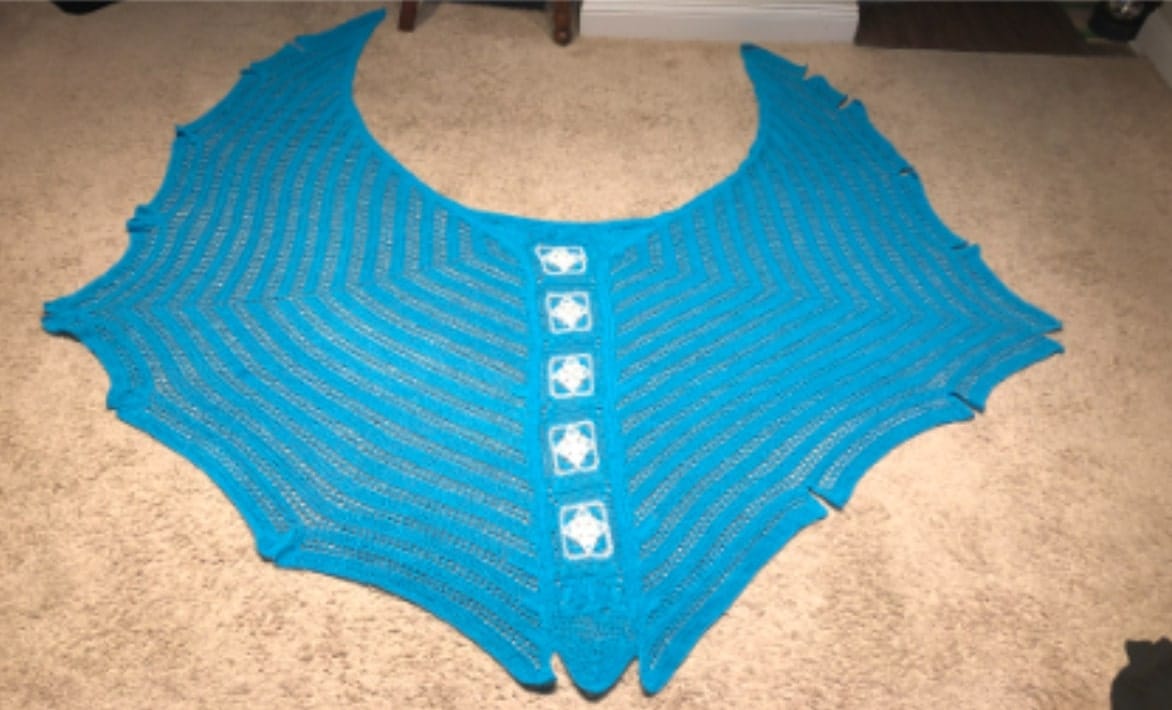
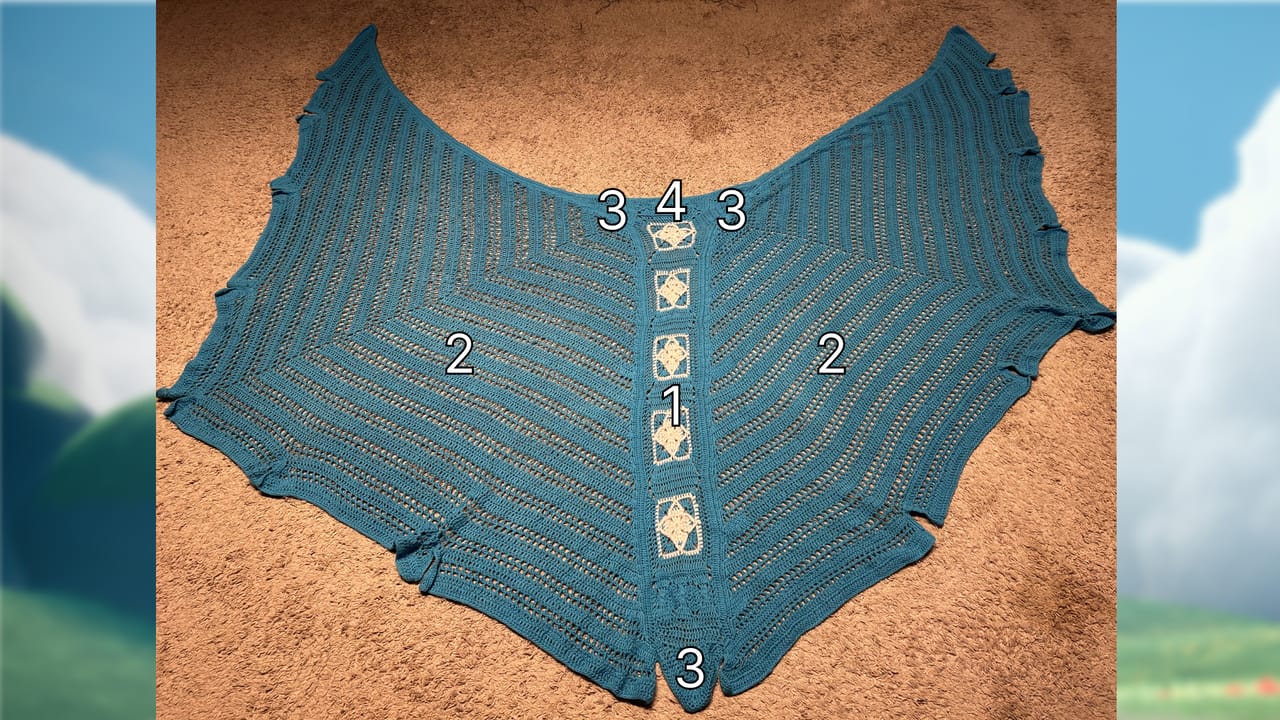
The cape is made out of these main parts:
The granny square spine: 5 squares
The two sides/wings of the cape: 2 halves
Three triangles: two to form the shoulders and connect the spine with the wings, and one for the middle tail at the bottom of the spine
Six smaller regular granny squares (3 each) to even out the neckline and the space between the spine and the tail triangle.
Lotus Yarns "Sky Blue" is the main yarn I chose to use because it was as close as I could find online to TGC Blue. Feel free to use any type or color of yarn you wish!
I generally go by feel as to what size hook I ought to use for a project, but I specifically chose a larger hook even though the yarn was relatively thin, so as to introduce a little more air and drape. The cape ended up being fairly weighty, so please consider that when choosing your yarn!
The spine/star granny squares are an adaptation of the Northern Diamond Square by @torunjcrochet.
You can find it for free posted here on Ravelry: https://www.ravelry.com/patterns/library/northern-diamond-square
I chose a bright white for the stars. I recommend that you carry the white and blue yarn under each other during the construction of the squares, as opposed to cutting your yarn during each color change, to ensure structural integrity and avoid creating several loose ends to weave in when securing the square.
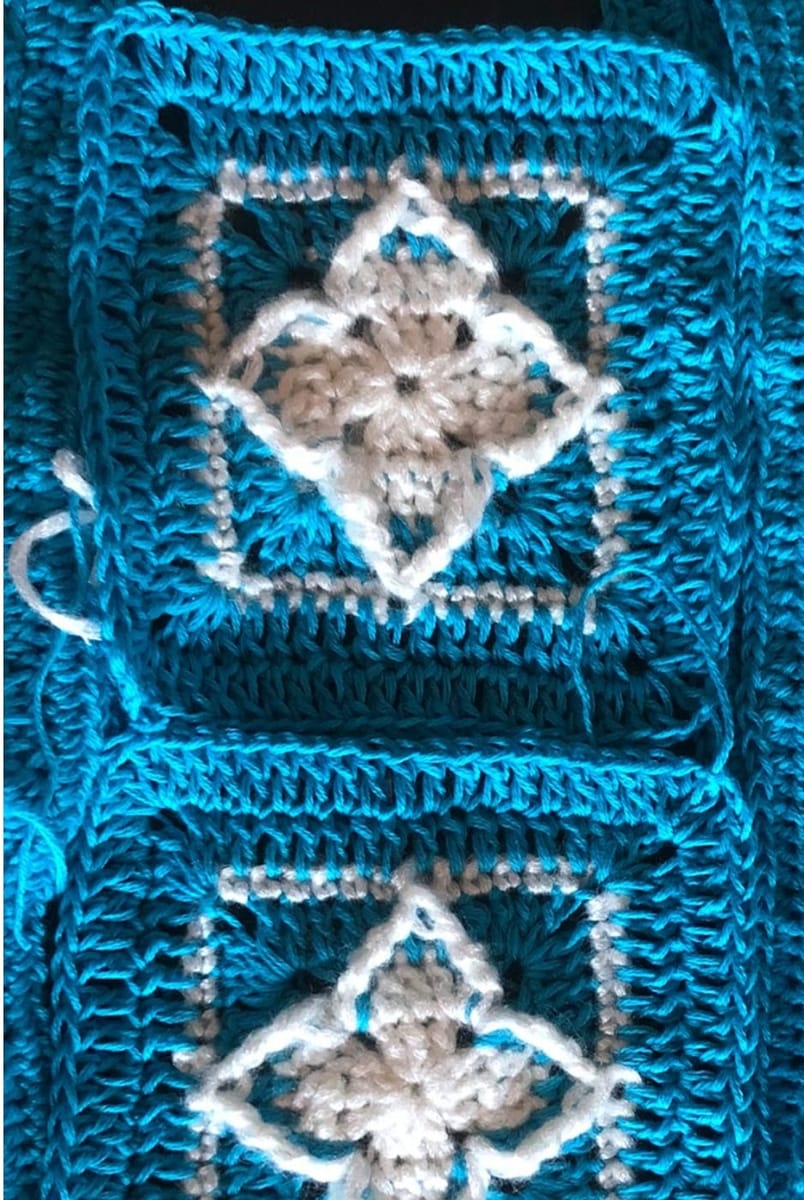
I found that when I created the star shape with five white stitches on each side on the second layer from the center (above), rather than three (below), the shape was more easily identifiable from a distance and looked better to me.
I highly recommend blocking your squares before stitching them together—I used single crochet to stitch them together. I found that stitching the spine-star squares together on the "wrong" side (opposite of the external star detail) made the "right" side look cleaner.
After you’ve stitched five star-squares together, I recommend going around the entire rectangle with either a single crochet or a half-double crochet to ensure all the squares stay put.
The two wing halves are from this site: https://wilmade.com/such-simple-shawl/
Essentially, most triangle cape or shawl patterns can be adapted to create each of the two halves of the cape. I liked the above-mentioned pattern specifically because it was easy to distinguish how many rows I’d crocheted since they alternate in opacity, it’s just a little more dramatic-looking.
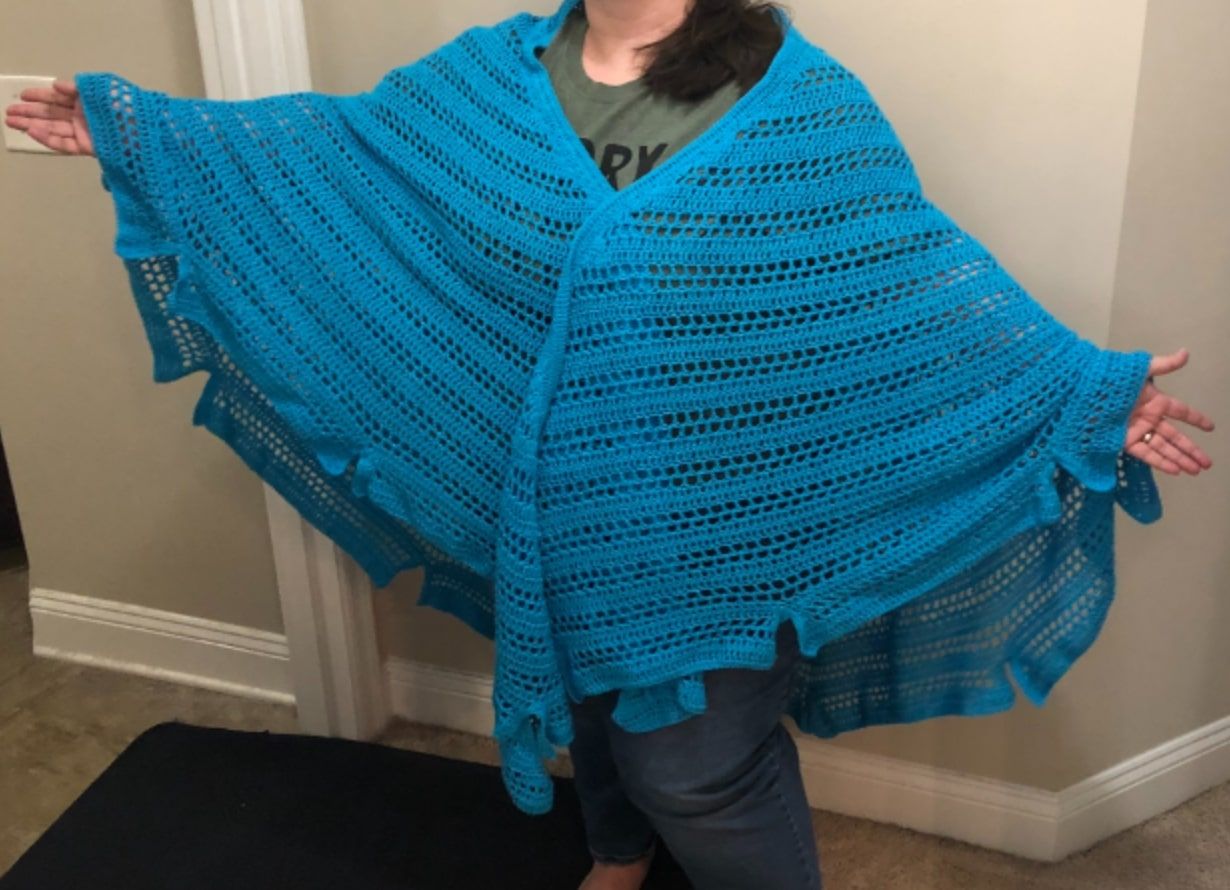
As long as you have two roughly-triangle shaped halves, or quadrangles in the case of the link above, it should look like a cape once you’ve attached everything together.
I had no idea how big this was going to get after it was blocked out, so I recommend draping the wing of the cape against your side every few rows to get an idea of when to stop.
You can find a pattern for the triangles on YouTube here: https://www.youtube.com/watch?app=desktop&v=i1Nfup0iksU
And a slew of basic granny square patterns for the smaller squares here: https://www.craftpassion.com/crochet-solid-granny-square-pattern/
I free-handed the shredded/flap bits on each side.
Counting out eight per half of the cape cuts the bottom into three (1-3) and the top side into five (4-8), which matches up with the cape’s in-game appearance.

These were measured by counting edge stitches and dividing them roughly equal-sized into three sections for the bottom half, and into four sections for the top half, then dividing the top-most section of the top half in half again, becoming sections 7 and 8.
Essentially, start from the middle (closest to the spine), and work your way back and forth, flipping your work a few times, until the flap is approximately the size you think matches with your cape ratios. Mine were all about four rows tall.
Then, single-crochet up the edge of the flap to start the process again for the next flap, until you reach the end or top-most of the cape. This part of the process was most easily done for me once all the pieces were pretty much stitched together, to make sure I had everything in the correct orientation for the final flourishes.
Towards the end, everything gets a border of half double crochet and single crochet, to ensure nothing falls apart! I went around a few extra times, just for security and to call it finished.
I hope this documentation is enough to start you on your journey, and I hope to see you all eventually posting your wonderful crochet cape creations!
I truly could not have ever anticipated the incredible response of our community when my cape creation was posted, and I am humbled and grateful that all of you fine folk were immediately looking for a pattern. Please make sure to tag us (@thatskygame) so I can see all of them and be inspired by your work!
— Chelsea